Adding new account tabs is a Premium Feature
Adding new account tabs to your WooCommerce account are super easy when using StoreCustomizer.
Simply navigate to Customize -> StoreCustomizer -> Account Page, and scroll down to the Add New Account Tabs section.
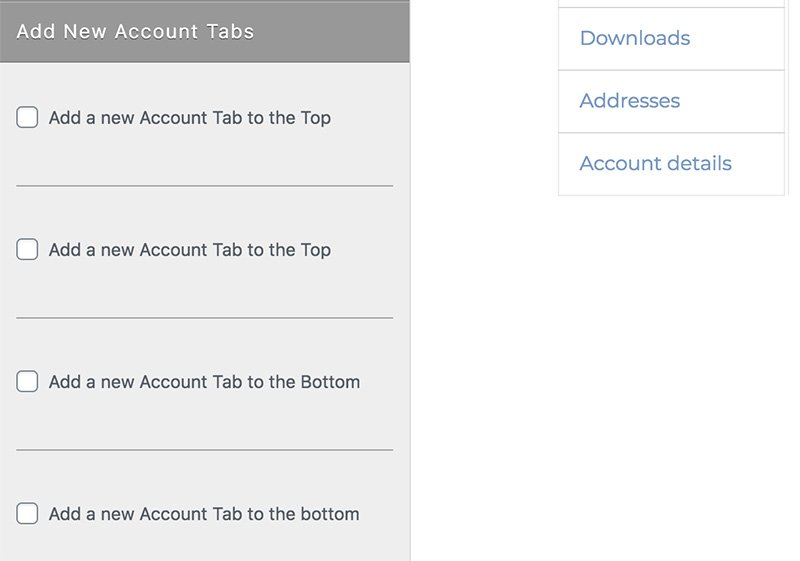
Now you can turn on a checkbox to Add a new Account Tab to the top or to the bottom of the user account tabs.
You might need to turn on any other account edit section for a new tab to display at the top… Read the post explaining more on that here.
Once you’ve turned on a new Account Tab, you’ll see that you can now edit the new Tab Title, Tab Page Title / Heading, and you can select which page content to display on the new User Account section.
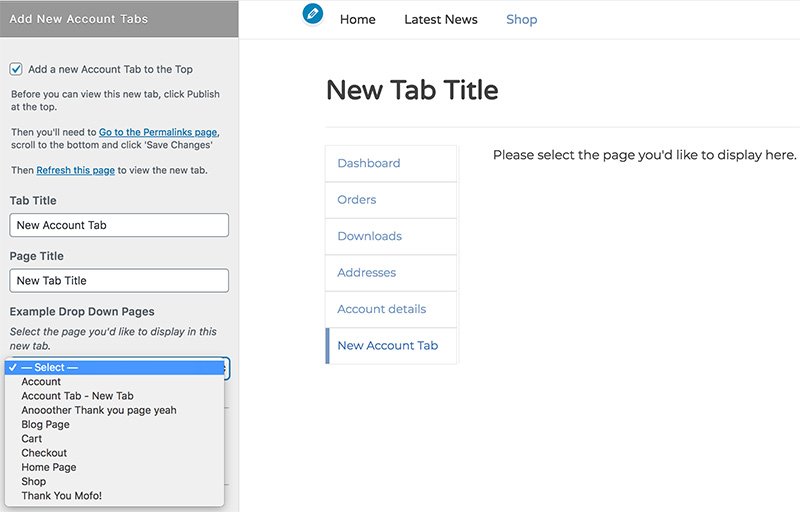
As you have just created a new section for the website, you might not be able to view this tab right away without updating the website permalinks. You will see a note explaining exactly what needs to be done for you to view the new tab you’ve just created in the Customizer.
You simply need to navigate out to Settings -> Permalinks in your WordPress Dashboard, scroll to the bottom and click Save Changes. Then you can navigate back to Customize -> StoreCustomizer -> Account Page and now you will be able to view the new tab.
StoreCustomizer will also now display the Page State in the WordPress dashboard pages list section.
